Growing up is hard…
April 22, 2018
Don’t Let Your Computer Go VIRAL
May 9, 2018Howdy Neighbors!
This week’s blog post is for our Mac users out there! Have you ever written a paper, letter, or email and lost the file due to your computer crashing or freezing? Have you ever been working on any file at all that got lost due to a glitch or an accidental click? Did you have to restart the entire file from scratch and spend double the amount of time that you had planned on it? That is so frustrating. I know it’s happened to me many times! Well, there’s an application on Mac that was made just for times like these! I’m going to tell you all about it!
Before I do, though, one way to make sure that your files are secure on any computer is to save them frequently as you work! If you’re working on a big file that is going to take a long time, it might even be safer to save it to an external hard drive! We all forget to do this from time to time, and that is why Mac has created this awesome tool to get your files back!
It’s called Time Machine. To use it, you need a USB, external hard drive, or any kind of external storage like that. Most people have USBs on hand, so that’s the most likely one you will use. But an external hard drive or Mac Time Capsule will work just as well! When you attach the USB (or other device) your Mac will ask you if you want to use it to back up with Time Machine, choose “Use as Backup Disk”. From now on, instead of waiting for automatic backups on your Mac, you can force an automatic backup onto your device. You can also decide what items you want backed up and which ones you don’t! So you’re not being forced to back up your entire hard drive onto your USB. You can narrow it down to just a few important files! After the first backup, Time Machine only backs up the items that have changed, so your backups will be shorter and shorter.
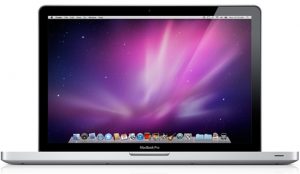
Now, to the part that everyone is most interested in, how to restore files from Time Machine! First of all, open the window that you want to restore from. For example, open the Documents folder to restore a document, open your inbox to restore an email, etc. If you have saved a file multiple times, you can even revert back to past saves before changes were made. Now, click Time Machine in your dock (where all of the apps are somewhere on the outer perimeter of the screen, you can see it in the bottom of the screen in the photo below!). You will see a timeline on the edge of the screen, choose the time you want to restore to and press space bar to preview it. Once you have decided where you want to go back to in the Time Machine, click restore. And VIOLA! Your file is back! Don’t delay, Neighbors! Set up your time machines ASAP so you never have to fear losing your files ever again!
A couple of things to remember to make sure that everything runs smoothly:
1. Remember to let your first backup run completely before shutting down your computer. This can take a long time! Just be patient!
2. Don’t remove a USB from your computer without first making sure it is safe to remove by going to your Finder and clicking the eject button next to the USB name. This will save your files from potentially corrupting from a forced eject!
3. Finally, don’t forget to save your files frequently, so that if anything happens, you will be losing the bare minimum. Time Machine is super helpful, but you have to work with it to make sure that it works correctly, and saving files frequently could save you the stress and trouble of having to navigate the Time Machine!
If you have lost a file or important email, come in to see us at the Member Center or call before panicking! We can do our very best to get your file back if possible! We are on your side, and we hate to see things like this happen to our Neighbors!
Don’t forget to keep up with all of our social media accounts for more updates, and we can’t wait to see you next week, Neighbors!
See ya!


